Saturday, September 28, 2013

Appetizer Plate- I have been actually cooking I promise

I have been busy these past two weeks enjoying celebrating my recent marriage to my husband with family and friends. I have been cooking some new dishes during that time and I remembered to take some pictures along the way. Soon I will update with new recipes. For now, I have my favorite pairing for a game night at our home. Wine and cheese! Since most of my gifts were new kitchen cookware I have been eagerly been using them. But included in that were amazing wine glasses which in my whole life I have never owned really good wine glasses. The ones without stems or taken from a garage sale and never used don't count. Since it was only in the past two years I got a palate for wine it make sense now to have the whole set of glasses for the different kinds. It's kind of awesome but now I need to use them! 

So, the give a little idea of what I pair with the wine for a little bite to eat before playing games I took the picture below. I usually pick up two special fancy cheeses from the store and then can add a brie or a regular cheddar and some fig or other kind of jam. Olives or those little pickles are good as well and you can either go the cracker route or use a small baguette sliced up. Very yummy and I also will add a small bowl of nuts, either almonds, hazelnuts or cashews depending on the night. 


Thursday, September 19, 2013

Sausage and Roasted Vegetable Penne Pasta Dish........AMAZING!

I absolutely loved, loved this dish. It took about 30min to make AND consume a small bowl before I had to run out of the house. It definitely makes my top five favorite recipes list. I'll update with a photo of the finished dish soon.

You can alter the recipe and add other vegetables to this dish that are your favorites like mushrooms, asparagus or maybe carrots?


Sausage and Roasted Vegetable Penne Pasta Prep Time: <5min Cook Time: 30min Clean up: 5-10min


1 yellow onion, cut into wedges
1 medium zucchini, sliced into thinner sections about 1/2 inch long
1 red bell pepper,  sliced into small pieces
2 1/2 tablespoons olive oil used to coat the veggies
Kosher salt and freshly ground black pepper
handful of pint grape tomatoes, washed and dried
4 medium/hot Italian sausage links, thinly sliced into small "meat balls basically". Or you could buy the sausage that is not in casings and roll them into small balls. It is extra work however.
1/4 cup white wine (pino grigio)
12 ounces whole-grain penne, cooked according to package instructions
Freshly grated Parmesan to top the dish

1.Preheat the oven to 400F, start boiling a pot of water to cook the pasta.
2. Chop up your veggies (except for the tomatoes, they are added later) and lightly toss in the olive oil and add some salt and pepper to taste. Place on a baking sheet covered in some aluminum foil and bake for 15min to caramelize.
3. Add the cherry tomatoes to the mixing bowl used previously for the other vegetables and toss lightly in the remaining oil. Cut up the sausage links and start to cook on medium/high heat in a skillet. No added oil necessary. Stir often though or turn the temperature down so they don't burn.
4. If the pot is boiling add the pasta, cooking according to the package directions, then drain and set aside till ready to add to skillet with sausage and vegetables once done baking in the oven.
5. When the 15minutes are up on the oven timer, stir the veggies on the baking sheet and add the cherry tomatoes, bake for another 15min.
6. When the sausage has been cooked, add a 1/4 cup of the white wine to the skillet and cook on medium/high scrapping the bottom of the pan with the spatula to deglaze.(Deglazing is a cooking technique for removing the browned food residue from a pan to make a sauce, when a piece of meat is prepared in a pan it leaves sugars in the bottom of the pan.)
7.When the veggies are done baking in the oven add to the skillet with about 75% of the pasta. See if there are enough noodles for your preference before adding all of them at once.
8. Serve with shredded Parmesan cheese on top. The flavor is really good and there is no sauce needed!


Tuesday, September 17, 2013

Pizza!

That is all I got for now. I made no rise pizza crust from scratch, added shredded mozzarella and pepperoni. Nothing fancy this time just regular old pizza. I do really love the prosciutto and red onion kind though. Yummy. The leftover pieces were super good cold. I'll update tonight with the crust recipe and how I made the sauce from just a can of tomato paste and spices etc. ( I didn't have sauce so I winged it, now I want to do this every time! No leftover Ragu pizza sauce to go bad in the fridge!)


Monday, September 16, 2013

I Have Not Taken A Vacation From Cooking

I just took a vacation from going to the grocery store! My husband and I have yet to plan out the meals for this week. We might be going tonight or tomorrow to the store so I have some time still, right?

The past week has been a flurry of activity since we are celebrating our recent marriage with friends and family this coming Saturday. I have been busy running circles in my apartment getting all the little details together, which in the end don't really amount to much other than a pretty moment. Pinterest, I curse you. lol

Kyle has been a really good sport about it all so far and my cat has been highly interested in all the piles of decoration crafts I have on the table. Bad combo, my fingers are crossed when away at work he behaves!

I have been cooking though! I made food and took pictures but have just gotten crazy busy to write it up and post them yet. I think after this saturday regular posting will continue again. I think regular life will continue then as well. I have not gone out to eat! That has been a triumph especially because our use to be favorite is Saturday and Sunday morning brunches out at cute little cafes around town. I just had to start making cute little brunches at home from food I got at the store instead. So far so good.

I may also have been catching up on season 2 of Rome while sitting on the couch a bunch as well. Just got it from the library and every free relaxing moment has been doing that.

Thursday, September 12, 2013

Easy Peasy Fancy Adult Mac N Cheese

Had a lot of fun making the mac n cheese last night. Got to try a recipe for the second time and in doing so learning how to make it taste and come out even better than the first time!

Even brainstormed with our dinner guests how to make it EVEN better!
This is enough for 4 people and I had about one serving extra for leftovers. We served our fancy mac n cheese with a small side spinach salad (small because I didn't have enough spinach! Sorry guys! Just more room for the main course right!?)

Next time I will try adding Chorizo dry sausage. Sounds really good. 

I have photos of the dish right out of the oven that I will update soon. Also the Chicken Noodle Soup recipe from yesterday.


Fancy Adult Mac n Cheese (serves 4) - Prep time: 20min Cooking time: 20min Clean up: 15min
8 slices of peppered bacon
salt/ pepper/ cayenne pepper (to taste)
3/4 of a small box of elbow macaroni
2 cups of milk
3 tablespoons unsalted butter
3 tablespoons all-purpose flour
3/4 of a 1 lb block of shredded medium cheddar cheese (was still super good without sharp cheddar, it can be so expensive!)
1 cup of shredded Gruyere cheese( I found it in the fancy cheese section after hunting around for it)
3 slices whole wheat sandwich bread, crusts removed (pulse in the food processor till fine crumbs to top the dish with before going in the oven)

Directions
Preheat the oven to 400 degrees F. (You can wait a bit to do this step if your oven heats up really fast)
1.Cook the bacon layered between paper towels in the microwave and cook on high for 3-4 minutes until the bacon is crisp. Remove carefully! There will be hot grease on the plate/paper towels. Transfer the bacon to a plate lined with paper towels and crumble when it is cool enough to handle.

2.Drizzle oil into a large pot of boiling salted water. Add the macaroni and cook according to the directions on the package, 6 to 8 minutes. Drain well.

* Have all your cheese shredded before you start to heat the milk*

3.Heat the milk in a small saucepan, but don't boil it! While the milk is getting warm, melt the butter in a small bowl in the microwave, 20 seconds on high or longer on a lower power setting.  While the butter is still hot stir with a fork, adding the flour. While whisking, add the butter/flour mixture to the milk on the stove in the sauce pan and cook for a minute or 2 more, until thickened and smooth. On low heat, add the shredded  cheeses slowly in small handfuls, adding more as it melts into the milk mixture, add1 teaspoon salt and pepper and other spices you prefer. 

4. Place the cooked macaroni into a 9 x 13 inch baking casserole dish and pour over the top the finished cheese sauce, you can tell if its still to liquid like milk if you haven't added enough cheese. Keep adding more if your cheese sauce is still too thin. Then add the crumbled bacon and stir well.

5.Place the bread slices in a food processor fitted with a steel blade and pulse until you have coarse crumbs. Sprinkle the bread crumb mixture over the top of the pasta. Bake for 20 minutes, or until the sauce is bubbly and the macaroni is browned on the top. (I check mine at 15min)

Wednesday, September 11, 2013

Dinner for Two Homemade Chicken Noodle Soup- good for the.....the love of cooking!


Okay, I was going to make homemade pizza for dinner last night but instead made a Chicken Noodle Soup recipe, also partly adopted from my old roommate. Her mom was a great cook and shared all her best and favorite recipes with my roommate when we both first moved away from home to go to college.


This was the best of all the times I have ever tried this recipe. I am going to try and make it like this EVERY time. It was super delicious and Kyle and I used leftover garlic bread from last nights Chicken Fettuccine Alfredo recipe.

Customize this recipe to your taste, if you prefer rice instead of noodles, or potatoes etc. do that. My previous version of this recipe has potatoes in it. Check it out here

Now, I have a small/medium sized cooking pot, I cannot make a lot of soup at a time unless I cook it in two separate pots. I have a list of kitchen stuff I want to buy and slowly I will add it to my collection and will be able to make lots of soup at once if I want. This recipe is for 2 people and usually I only have about a single serving left over after we both take two large bowls to eat for dinner.

Depending on what type of cookware you have, adjust by adding more or less veggies and more or less broth (chicken stock/ Better than Bouillon) for your personal preference.

What made this taste so good I think was using this product pictured below. I used slightly more than it says because the flavor was super good. You can adjust the flavor when you add it to the pot, of course you can always add more but not take it away so be cautious when mixing it to your preference. First thing would probably be to follow the label on the container first.

This recipe has a lot of notes in it, if you know what your doing, ignore! I just felt I would add all the little things I do when I make this recipe so I can do it again the next time.

Homemade Chicken Noodle Soup Prep Time: 10-15min Cook Time: 20min Clean up: 15min
2 chicken breasts small or 1 large chicken breast
Egg noodles (about half a large package)
1 small onion
3 ribs or stalks of celery (I usually cut the stalk in half and then chop into pieces)
1 large carrot (diced)
2 cloves of garlic (diced)
1 dried basil leaf (optional)
Soup Spices (pepper, salt, basil, oregano, etc.)
2-3 tablespoons of "Better than Bouillon"

  • This stuff is great! I think it is the first time I used it for an actual soup and I like it even better than the stuff in the carton or can. If you never seen it before (I sure hadn't until last month, here it is) I used this image from the Walmart website from a Google search. Remember to refrigerate after opening! This product is great because no leftover half used chicken stock container in your fridge going bad. I always had this problem and chicken stock is not cheap. Soon though I want to make my own and have it in the freezer. One day!

1. Cook your chicken on the grill or in a large skillet on the stove. When done set aside to cool on a plate for cutting up in to smaller chunks for the soup.
2. Boil the cut up veggies in water that just barely covers them with a small teaspoon of Bouillon flavoring, the carrots will take the longest so I usually cut up and throw them in first and let them boil on medium/low heat just barely covered with water while I cut up everything else, then add the rest of the veggies.
3. Once the veggies have softened to your preference, add the cut up chicken, spices and the 1-2 quarts of water (how much soup do you want to make and how chunky?) mixed with the Better than Bouillon Base, the container explains how to measure and mix it. I just tap in the 2 tablespoons of base into a large measuring cup and then add hot water, mix it up using the tablespoon till dissolved mostly and off the spoon and then dump into the pot. 32oz/ 4cups = 1 quart.
(For this recipe I did 2 heaping tablespoons of the product, then added 4 cups of water mixed in with it, tasted the broth once it heated up, then once I had added the chicken and noodles it was perfect).
4. Cook your egg noodles in a separate pot, I prefer this because I like my noodles al dente and slightly hard still and if I tried to cook them in with the veggies etc. they would get soggy. Cook them according to the package instructions but usually about 9 minutes works. Take one out and eat it once cool to see if they are done and to your preference. I then drain the noodles and add them to the bottom of the serving bowl and spoon the rest of the soup on top once done.(If you leave the noodles in the pot, add a small amount of olive oil and stir, this helps keep the noodles from sticking to each other.)
3. Bring the pot with the veggies and broth back up to a boil and then lower the temperature to simmer for another 3-5 minutes till the broth has heated up. All ingredients have been cooked at this point.
4. Remove the basil leaf, scoop the soup over the noodles in your serving bowls and enjoy!


Tuesday, September 10, 2013

Fettuccine Alfredo (not the kind with a cup of butter) with Grilled Chicken and Side Spinach Salad

Okay, I have another great recipe to share with you that I received from my old college roommate. I tried looking up other recipes for Fettuccine Alfredo and mostly all of them sound so terrible due to the amount of butter and heavy cream they call for that I never want to try it. That and the reviews say its too rich or they can't get the sauce to taste right. So, far I have stuck with the same old recipe I have been given and it works just great! Now, this gives just enough sauce to coat the noodles and not a lot of extra which is just fine with me.

Fettuccine Alfredo Prep Time: 5min Cook Time: 15-20 Clean up: 10-15min
(double the recipe if for more than 2 people)
1 cup of milk
1 egg yolk
1/2 package of fettuccine noodles (cooked for 9-12 minutes)
spices to your tastes (salt, pepper, cayenne pepper, basil, oregano etc.)
2 tablespoons of butter
1 package of shredded Parmesan cheese.

Its that easy! Serve with side salad, chicken and garlic bread.

1. Grill the chicken or cook how you prefer. When the chicken is close to done start the pasta, make sure you have enough time (10-15) to cook the pasta and sauce so the chicken doesn't get cold.
2. Cook your noodles according to the package directions and to your desired Al dente.
3. If you want to cook garlic bread in the oven put it in when the noodles are halfway done, the garlic bread usually takes 10-13minutes. 
4. Mix the milk, spices and egg yolk in a small bowl, whisking them together.
5. Once the noodles have been cooked, drain them and throw them back into the pot with the butter on medium heat. Once the butter has mostly melted, add the milk mixture to the noodles and once the liquid has heated up slowly mix in the Parmesan cheese in small handfuls.
6. When the sauce has thickened and is sticky all over the noodles you are done. Serve immediately and I suggest placing the extra noodles in another bowl or tupperware container after your done serving. Soak the pot while you eat. Makes great reheated lunch leftovers.

Monday, September 9, 2013

UPDATED Sweet and Sour Chicken with Rice Recipe- Easiest Recipe Thus Far!

Okay, I finally found a recipe that I really really like. It was the easiest one to make so far, the clean up was super quick and the food tasted very yummy!


I will post the recipe and the photos tonight to update. I was super busy over the weekend and gone for most of the day both Saturday and Sunday but managed to make dinner one of the nights! Was out of town on Saturday out on a boat so we ate a lot of snacks and sandwiches during the day. When we got off the boat then we just ended up eating at a restaurant before heading home. I didn't think I could wait the hour long drive back to then cook and eat at home. Even though we had quick to make spaghetti. 

It happens.

If you try any of the recipes this would be the one to try, but you have to like sweet and sour sauce and pineapples. If that isn't your thing, then I would have to say try it with something else. I will be working on this recipe in the future with other ingredients but the ones I found and used so far are really good! You even make the sauce yourself!

UPDATE:

Sweet and Sour Chicken with Rice Prep Time: 10 min Cook Time: 20min Clean up: 10-15min
2 tablespoons vegetable oil
2 boneless chicken breasts, sliced into strips
Salt and pepper
1/2 of a chopped red pepper
1/2 of a chopped green pepper
3 ribs of celery (a.k.a stalks of celery)
4 teaspoons cornstarch, mixed with 4 teaspoons water
1 16 oz canned pineapple chunks, drained with 1/2 cup reserved juice
3 tablespoons light brown sugar
3 tablespoons rice vinegar
1/4 cup chicken stock

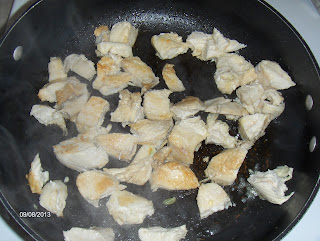
1. In a large non-stick skillet, heat oil over medium high heat. At the same time start to cook your long grain white rice or other favorite. Season chicken and add to the pan, when almost cooked through, remove and cut into strips and then continue to brown the chicken. Remove the browned chicken and place onto a plate. 
2. Add red and green peppers to the pan and cook for 1 minute. Then add the pineapple chunks, juice, sugar, vinegar and chicken stock and bring to a simmer. Simmer until sauce begins to reduce, wait only about 2-3 minutes otherwise you wont have much sauce.
3. Stir in cornstarch mixture and bring liquid to a simmer. Stir in chicken strips and cook for another 5 minutes. Serve over white long grain rice.


Saturday, September 7, 2013

Dinner for Two, French Onion Soup Recipe

I finally have bay leaves to use in recipes! Does this actually do anything to the taste? I cannot tell. I think this will be the question of the week. I will find out and get back to you.

French Onion Soup Prep Time: 10min Cook Time: 50 min Clean up: 10min
1/2 cup unsalted butter
3 onions, sliced
2 garlic cloves, chopped
2 bay leaves
1 tablespoon of thyme
Salt and freshly ground black pepper
1 cup red wine, I choose a cabernet sauvignon
3 heaping tablespoons all-purpose flour
2 quarts beef broth
1 baguette, sliced
1/2 pound grated Gruyere (I only grated half of the small block of cheese, save the rest for later and make the fancy adult mac n cheese recipe!)


1. Chop the onions into slices and mince the garlic. Heat up on medium heat in a large sauce pan or skillet the 1/2 cup of butter. Once the butter has melted add the onion, garlic, bay leaves, thyme, salt and pepper. Cook for 25 minutes stirring occasionally till the onions have caramelized.

2. After the onions have caramelized, add the 1 cup of wine and bring to a boil turning the heat up a bit. Simmer till the wine is almost gone and take out the bay leaves. Add the flour, dusting the onions with it. Stir the onions with the flour around and turn the heat down the medium low so the flour doesn't burn. Cook the onions with the flour for about 10 minutes then add the beef broth, simmering for another 10 minutes. Season to taste by adding more salt/pepper. 
3. When the soup is simmering in the last 10 minutes step start your bread and cheese preference in the broiler of the oven. We did small finger sized bread pieces with a bit of butter and cheese sprinkled on top. If you pre-cut slices and then place on the cooking sheet back together in it original shape it helps keep the cheese from falling off.  Cook on broil for about 3-5 minutes. Use to dip into the soup or float on top. 
4. If you have the oven safe bowls you could put the soup inside, top with some bread and cheese and then broil to toast the bread and cheese. This is what I want to do next time when I have bought the bowls!